3D Medical Animation
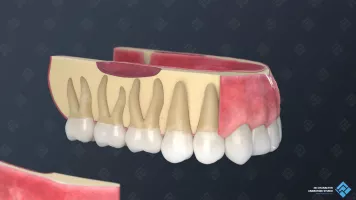
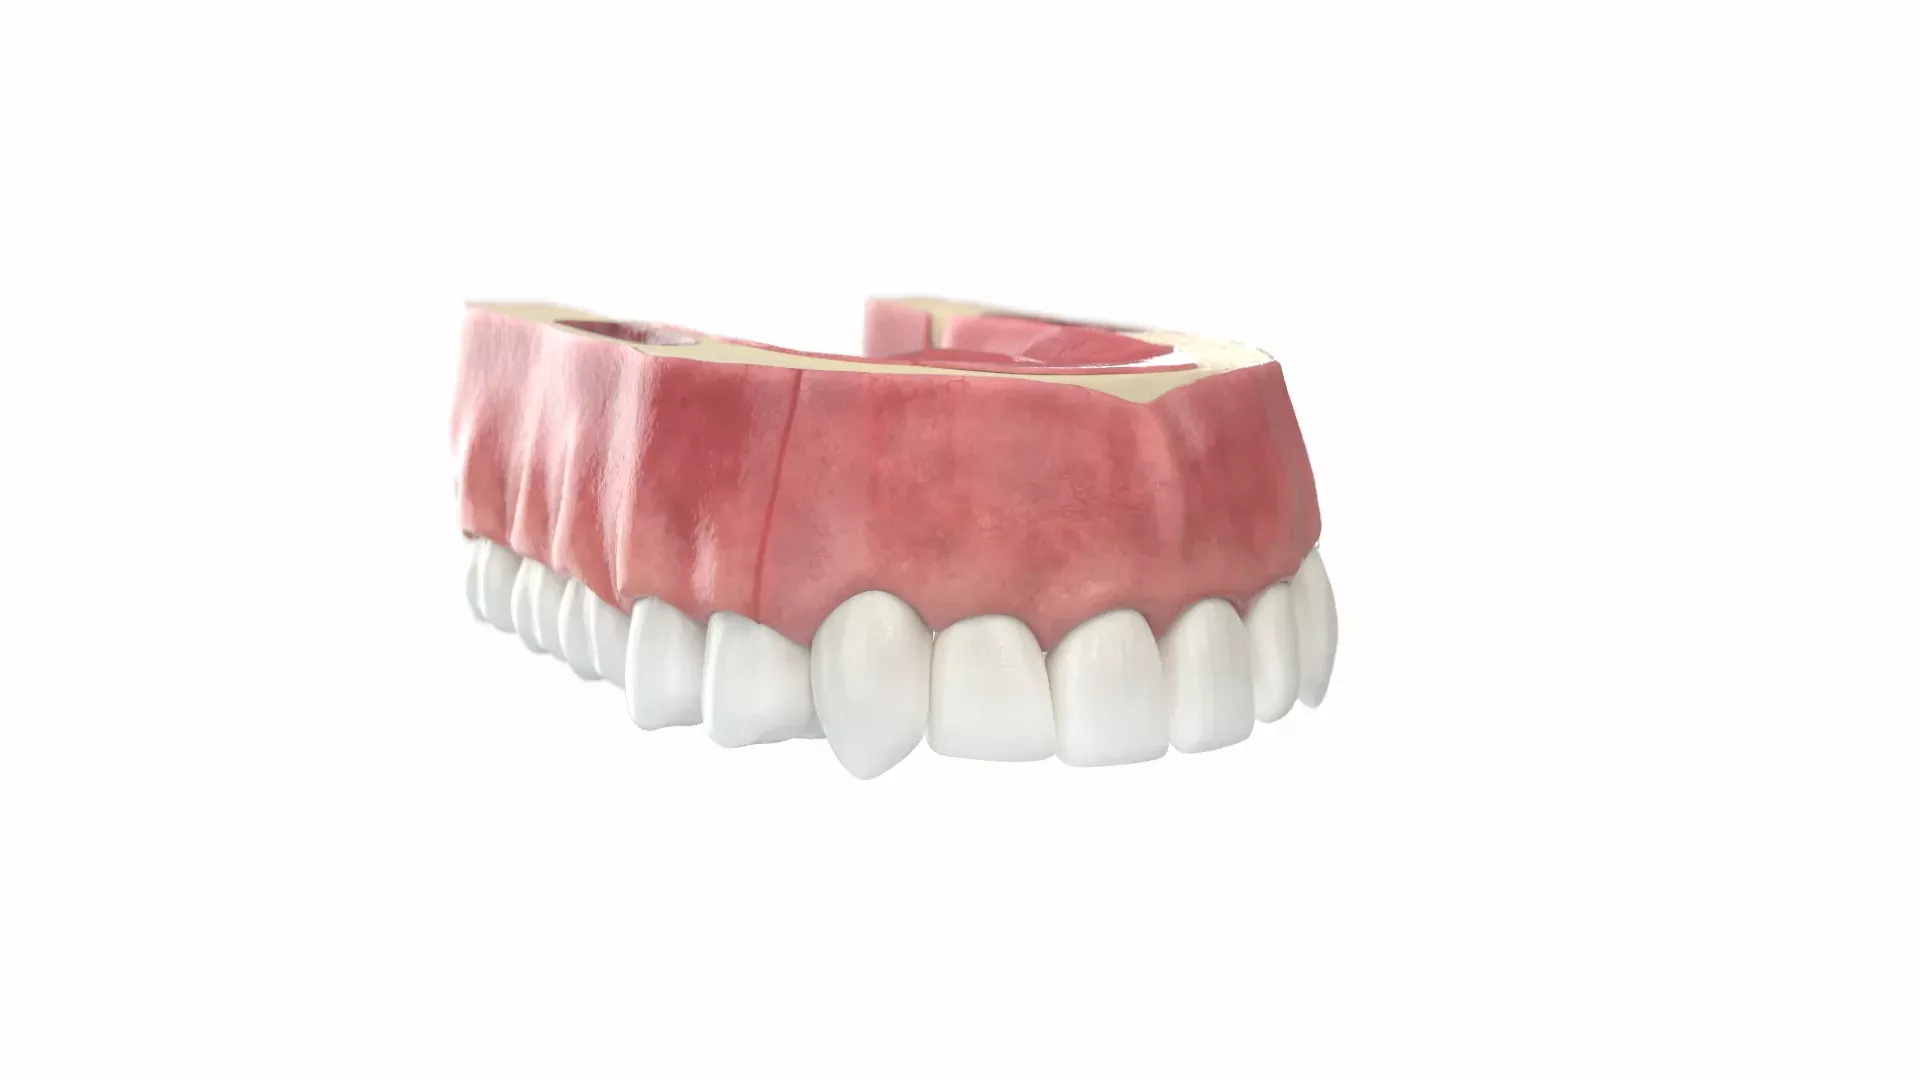
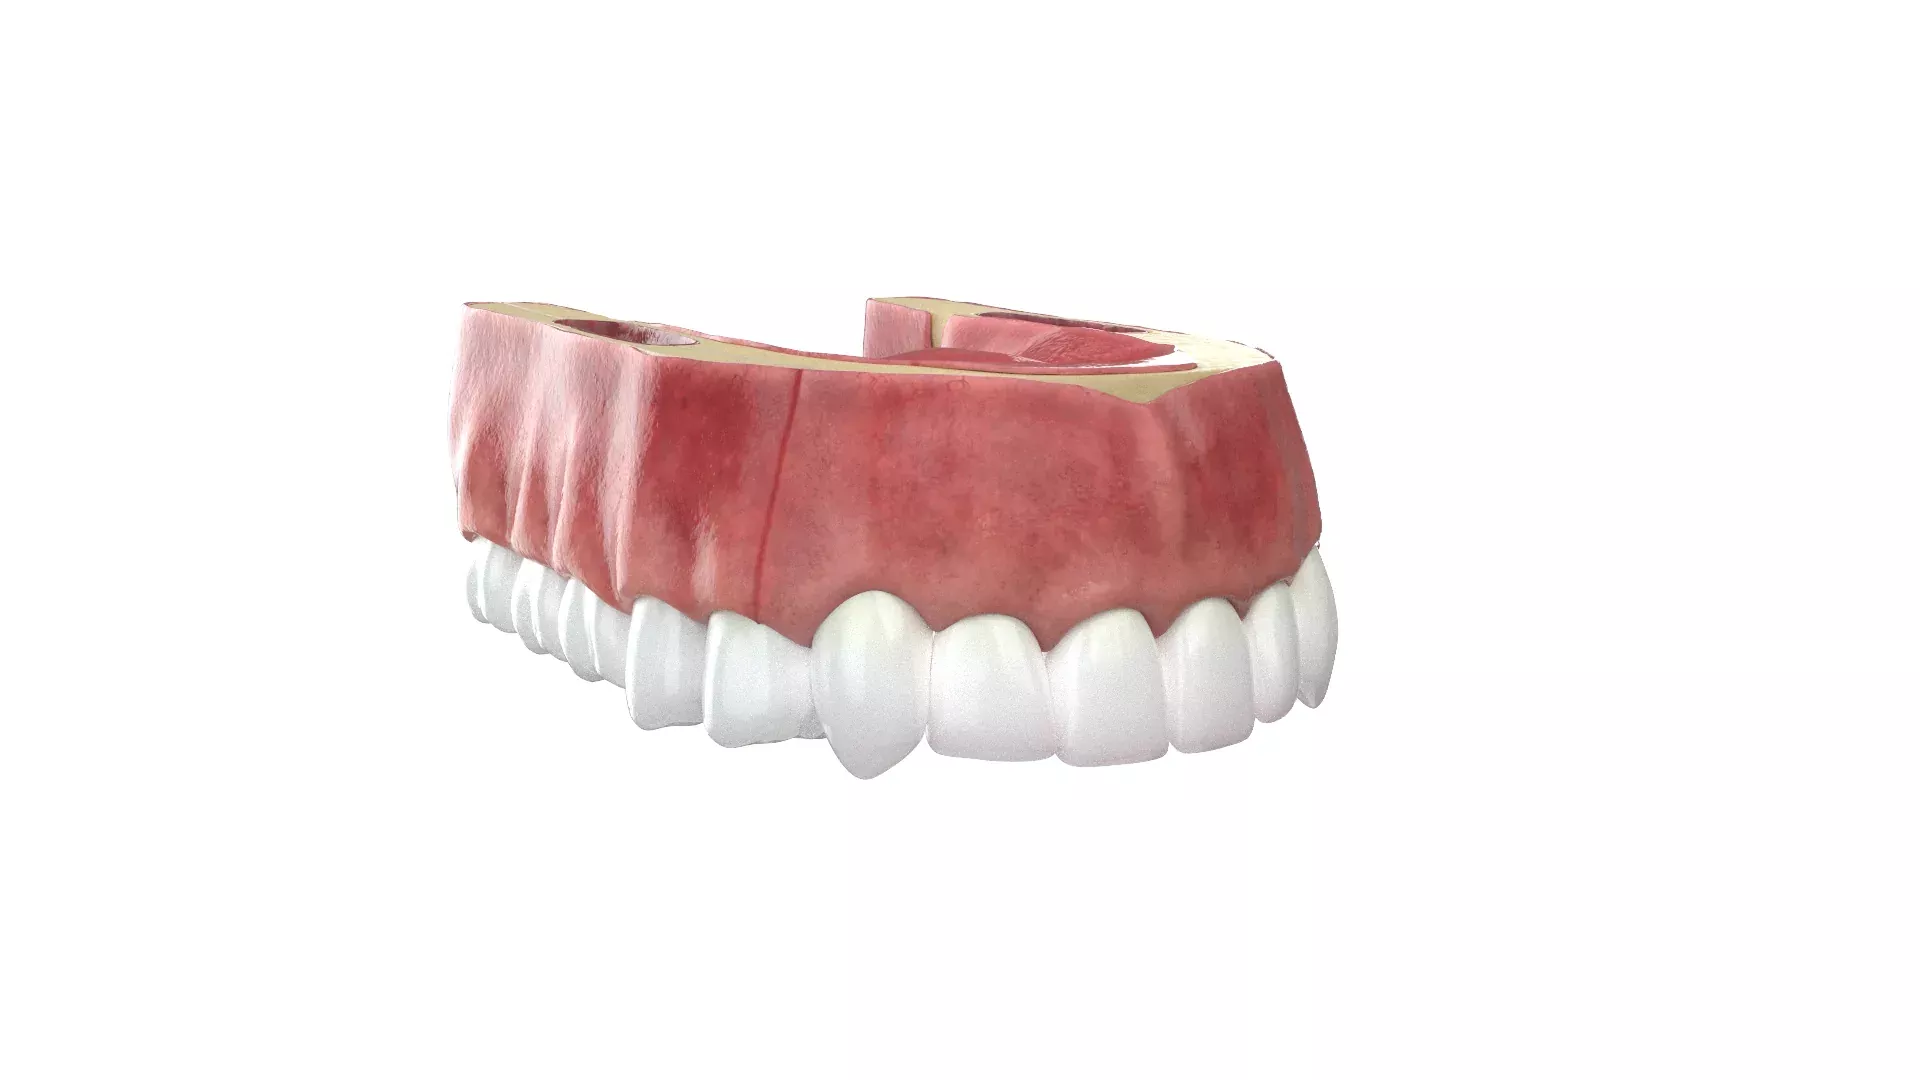
It is a 3D animation we made for the dental clinic chain in Israel. In this video, we avoided the regular anatomic literalness inherent in the client's market. The client gave us significantly more time for work than before, and we tried to use it to the maximum. The main idea was a combination of clean semi-transparent surfaces, futuristic design, and white that represented the clearness of surgery.
Related projects to 3D Medical Animation
Be informed of video advertisement ways, use it for your business and become the first!
Specifications
-
Complexity:171 WM/SEC
-
Duration:56 SEC
-
Work hours:160 WH
-
Work days:WD
Supposed Price
-
Turn on JS to see the cost.
-
Turn on JS to see the cost.
The current price reflects the increased complexity of the 3D animation compared to this example, due to the continuous advancements in software and hardware.
Breakdown ofthe 3D Medical Animation
Research
The 3D animation helps the client's patients to choose between two common types of implants: the endosteal and basal. Before we started writing the text for a voice-over, we had to gather and analyze information about the clinic’s offers and how its clients made their decision. We had to answer the following questions:
- Why do I have to go through the implantation surgery, and not just remove my tooth?
- How is the implantation going on?
- Which type of implant is the best for me?
Our client offered complex medical services, and what sounded clear for the surgeon were difficult to understand for a patient. We had to transform medical terms into plain words and warn about the wrong choices that could make the patient's life worse. There were some non-obvious consequences: shifting of the teeth row and thinning of the jaw's bone. Then, we showed the difference between the two types of implants and methods to help the patients understand using arguments, not only epithets.
Comparison of Two Methods
Writing a Copy for Voiceover
It took us three stages before we finished the text. First, we were creating, then we were thinking, and finally, we were polishing the voiceover text. The text should never be sent without editing - it always needs correcting, clarifying, and rewriting unless it's short enough and fits our goals. Every edit should be based on the real reason after analysis and seeking weak words.
WRITING & EDITING THE TEXT
74
Text reducing rate
We've reduced the text size from 2,371 to 620 characters or by 74%, which means a higher sense density for a second of the animation and a higher complexity for the same money. Both of them increase the conversion of the video.
Design & Optimization
The idea
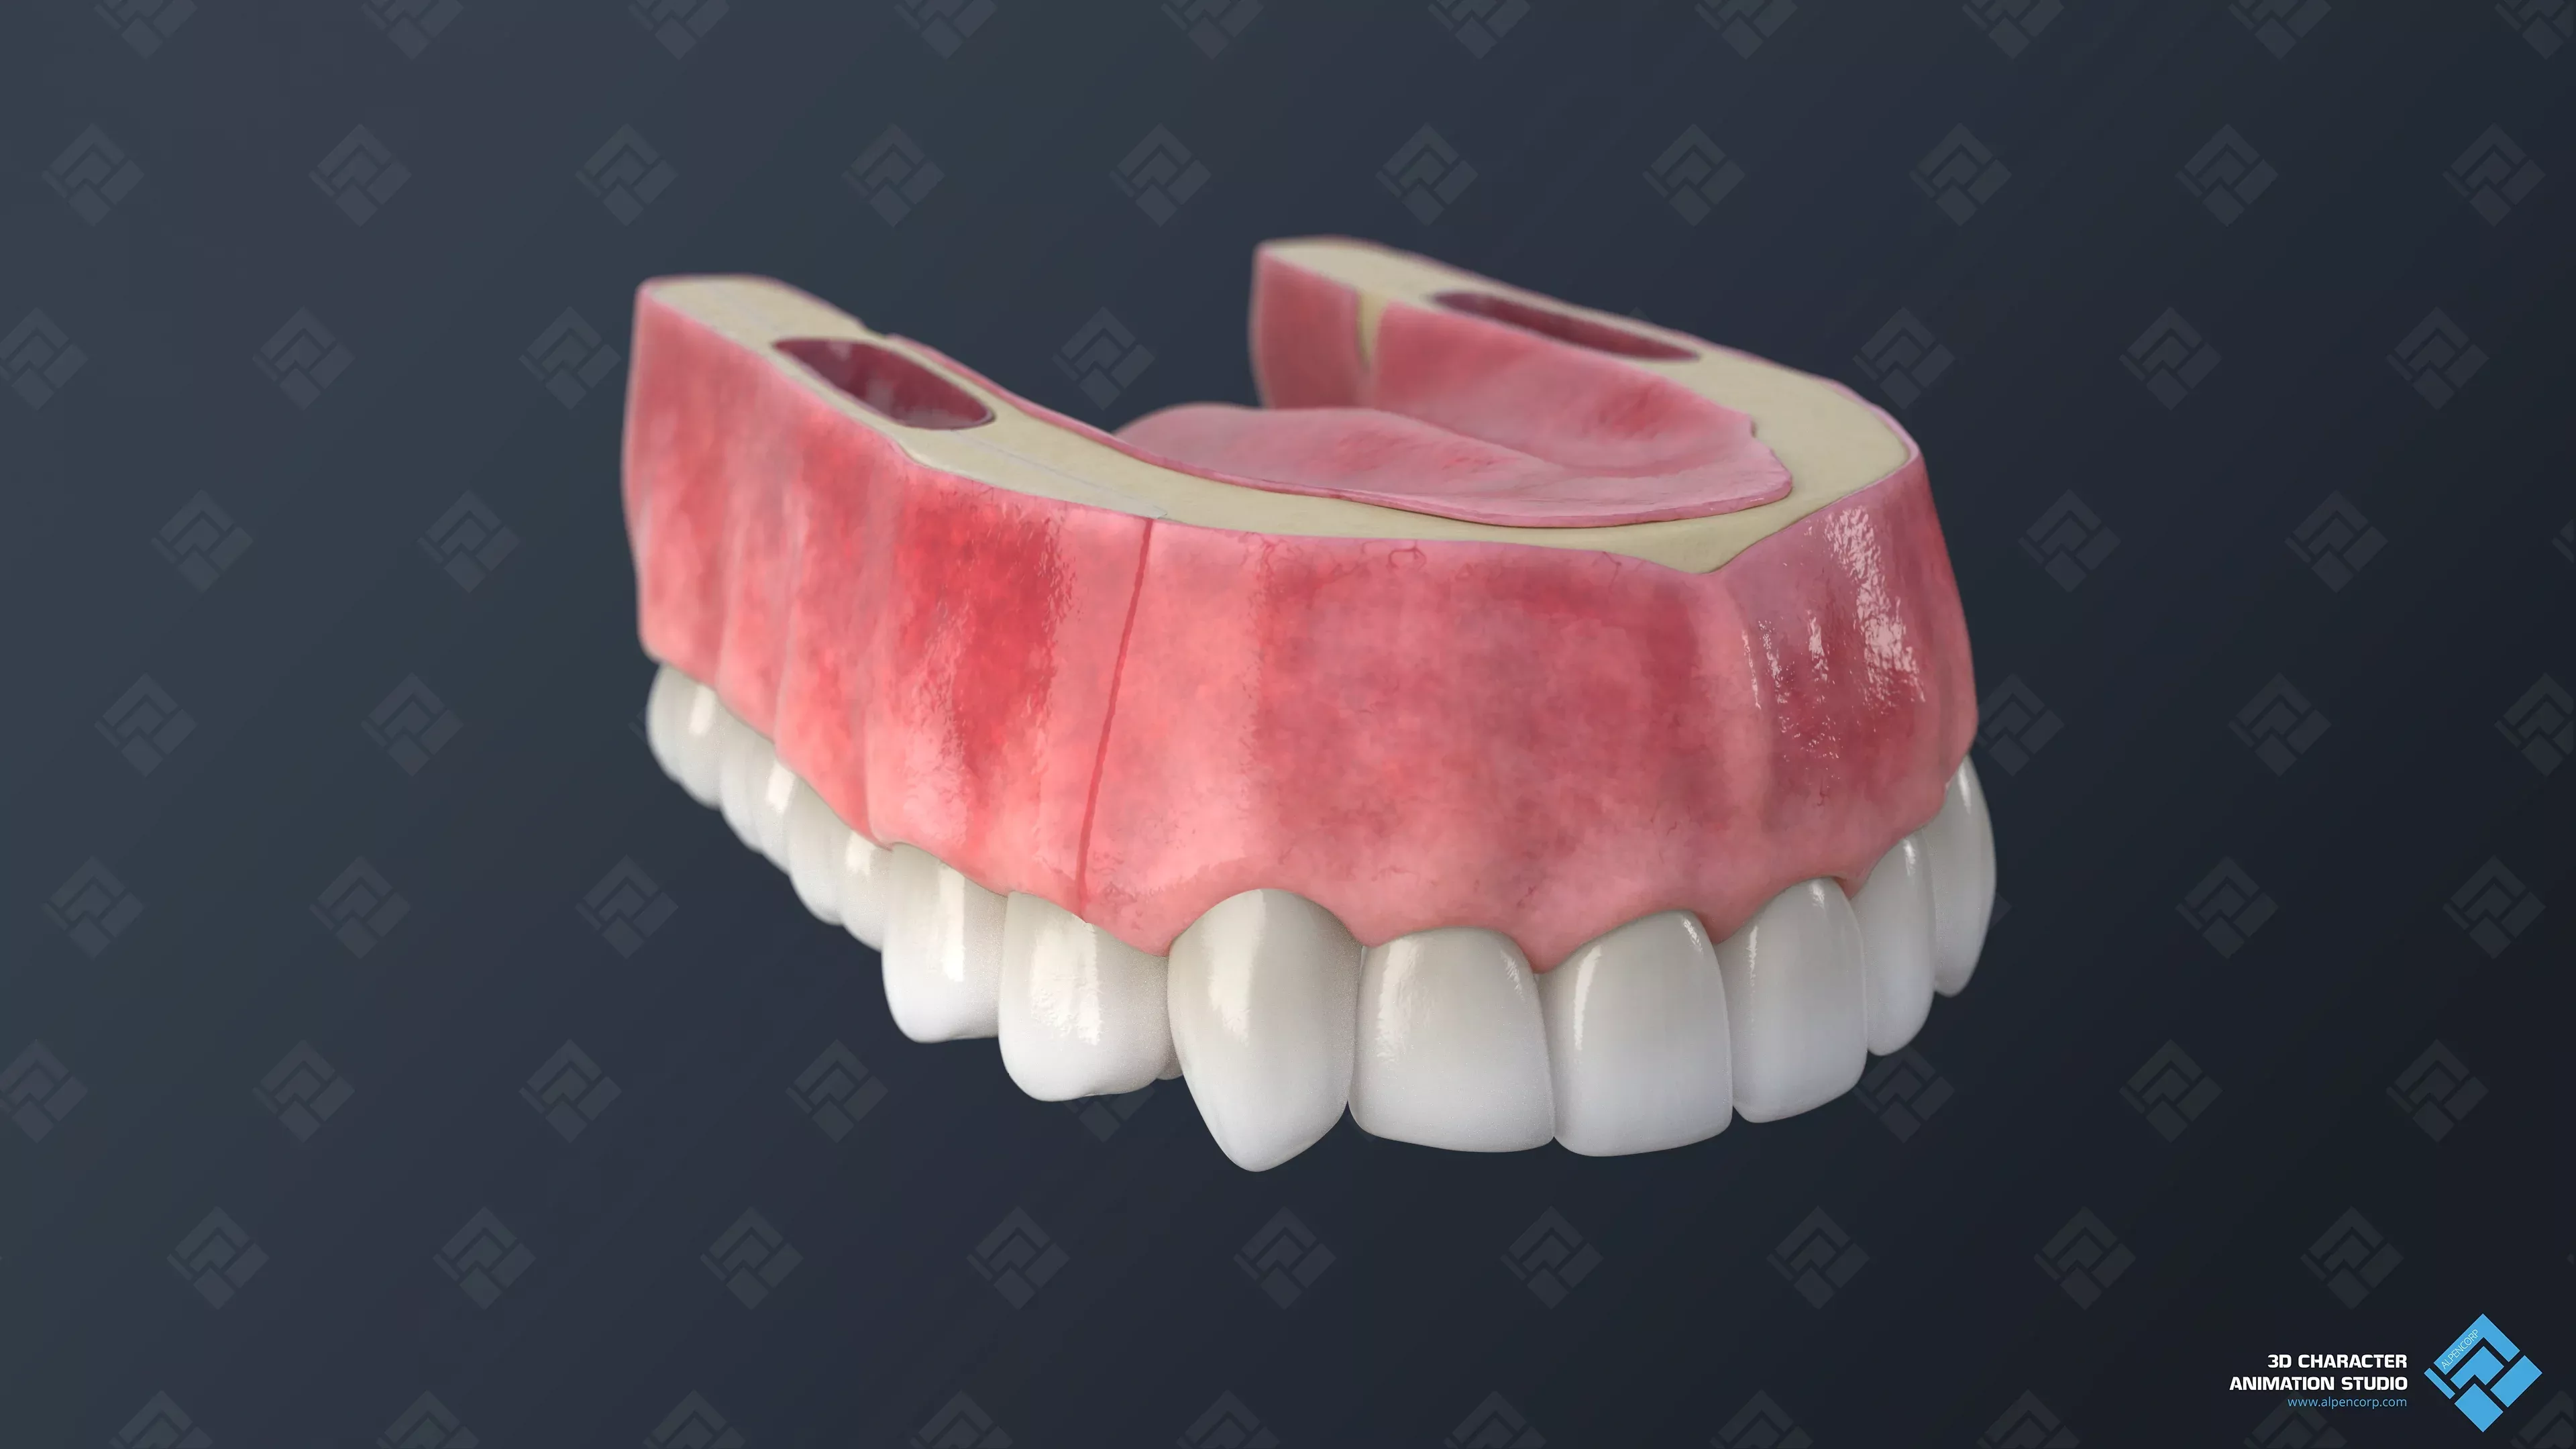
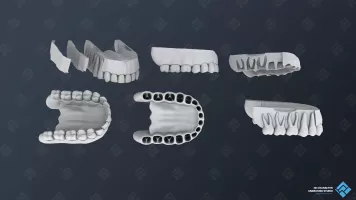
Conceptual medicine and minimalism. The animation isn't an anatomy study case but tells us about the dental clinic's methods and advantages. We can go away from familiar materials and endow the objects of an illustration power through color and physical qualities. The conceptual method delivers the feeling of clearness and technology.
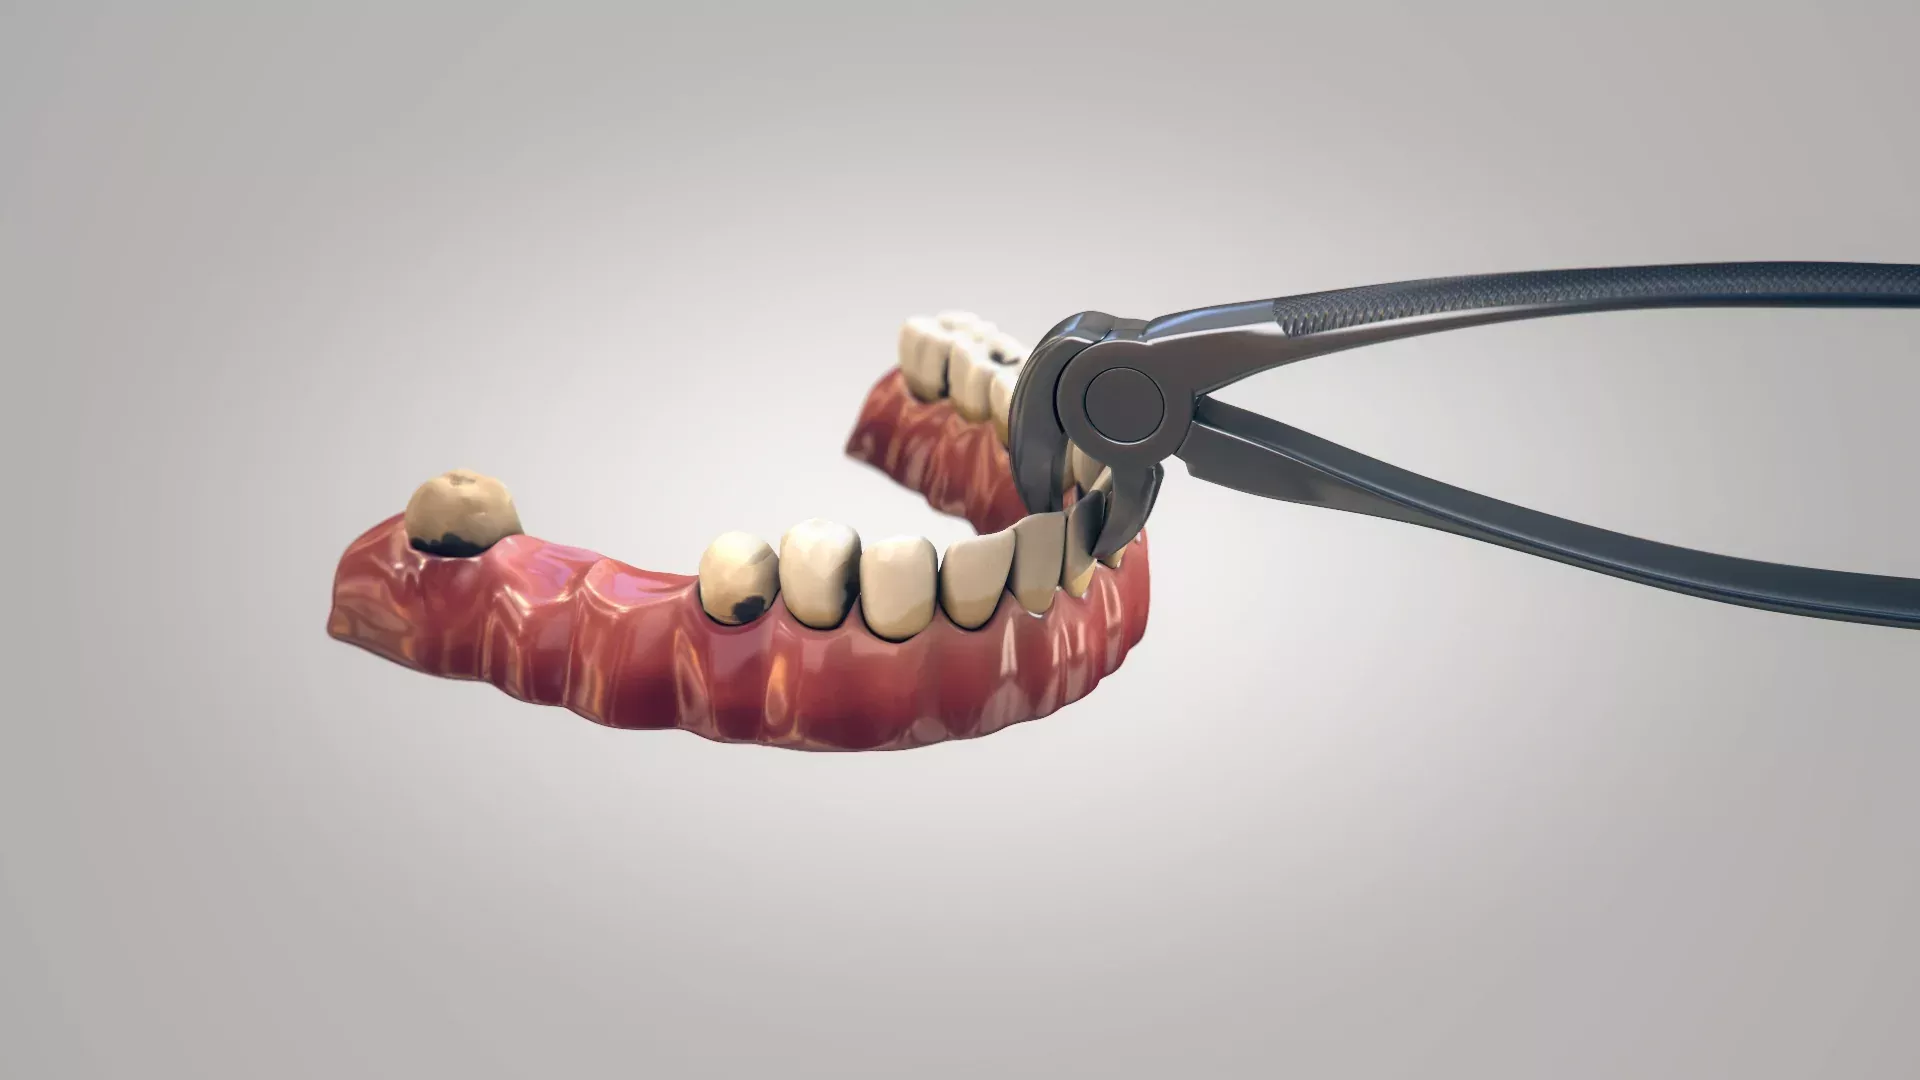
As a counterweight, most dental clinics gravitate to anatomical details, which leave their clients with a terrible bloody impression of painful surgeries. So, it's the best way to freak out the clinic's patients and make them delay the appointment as long as they can.
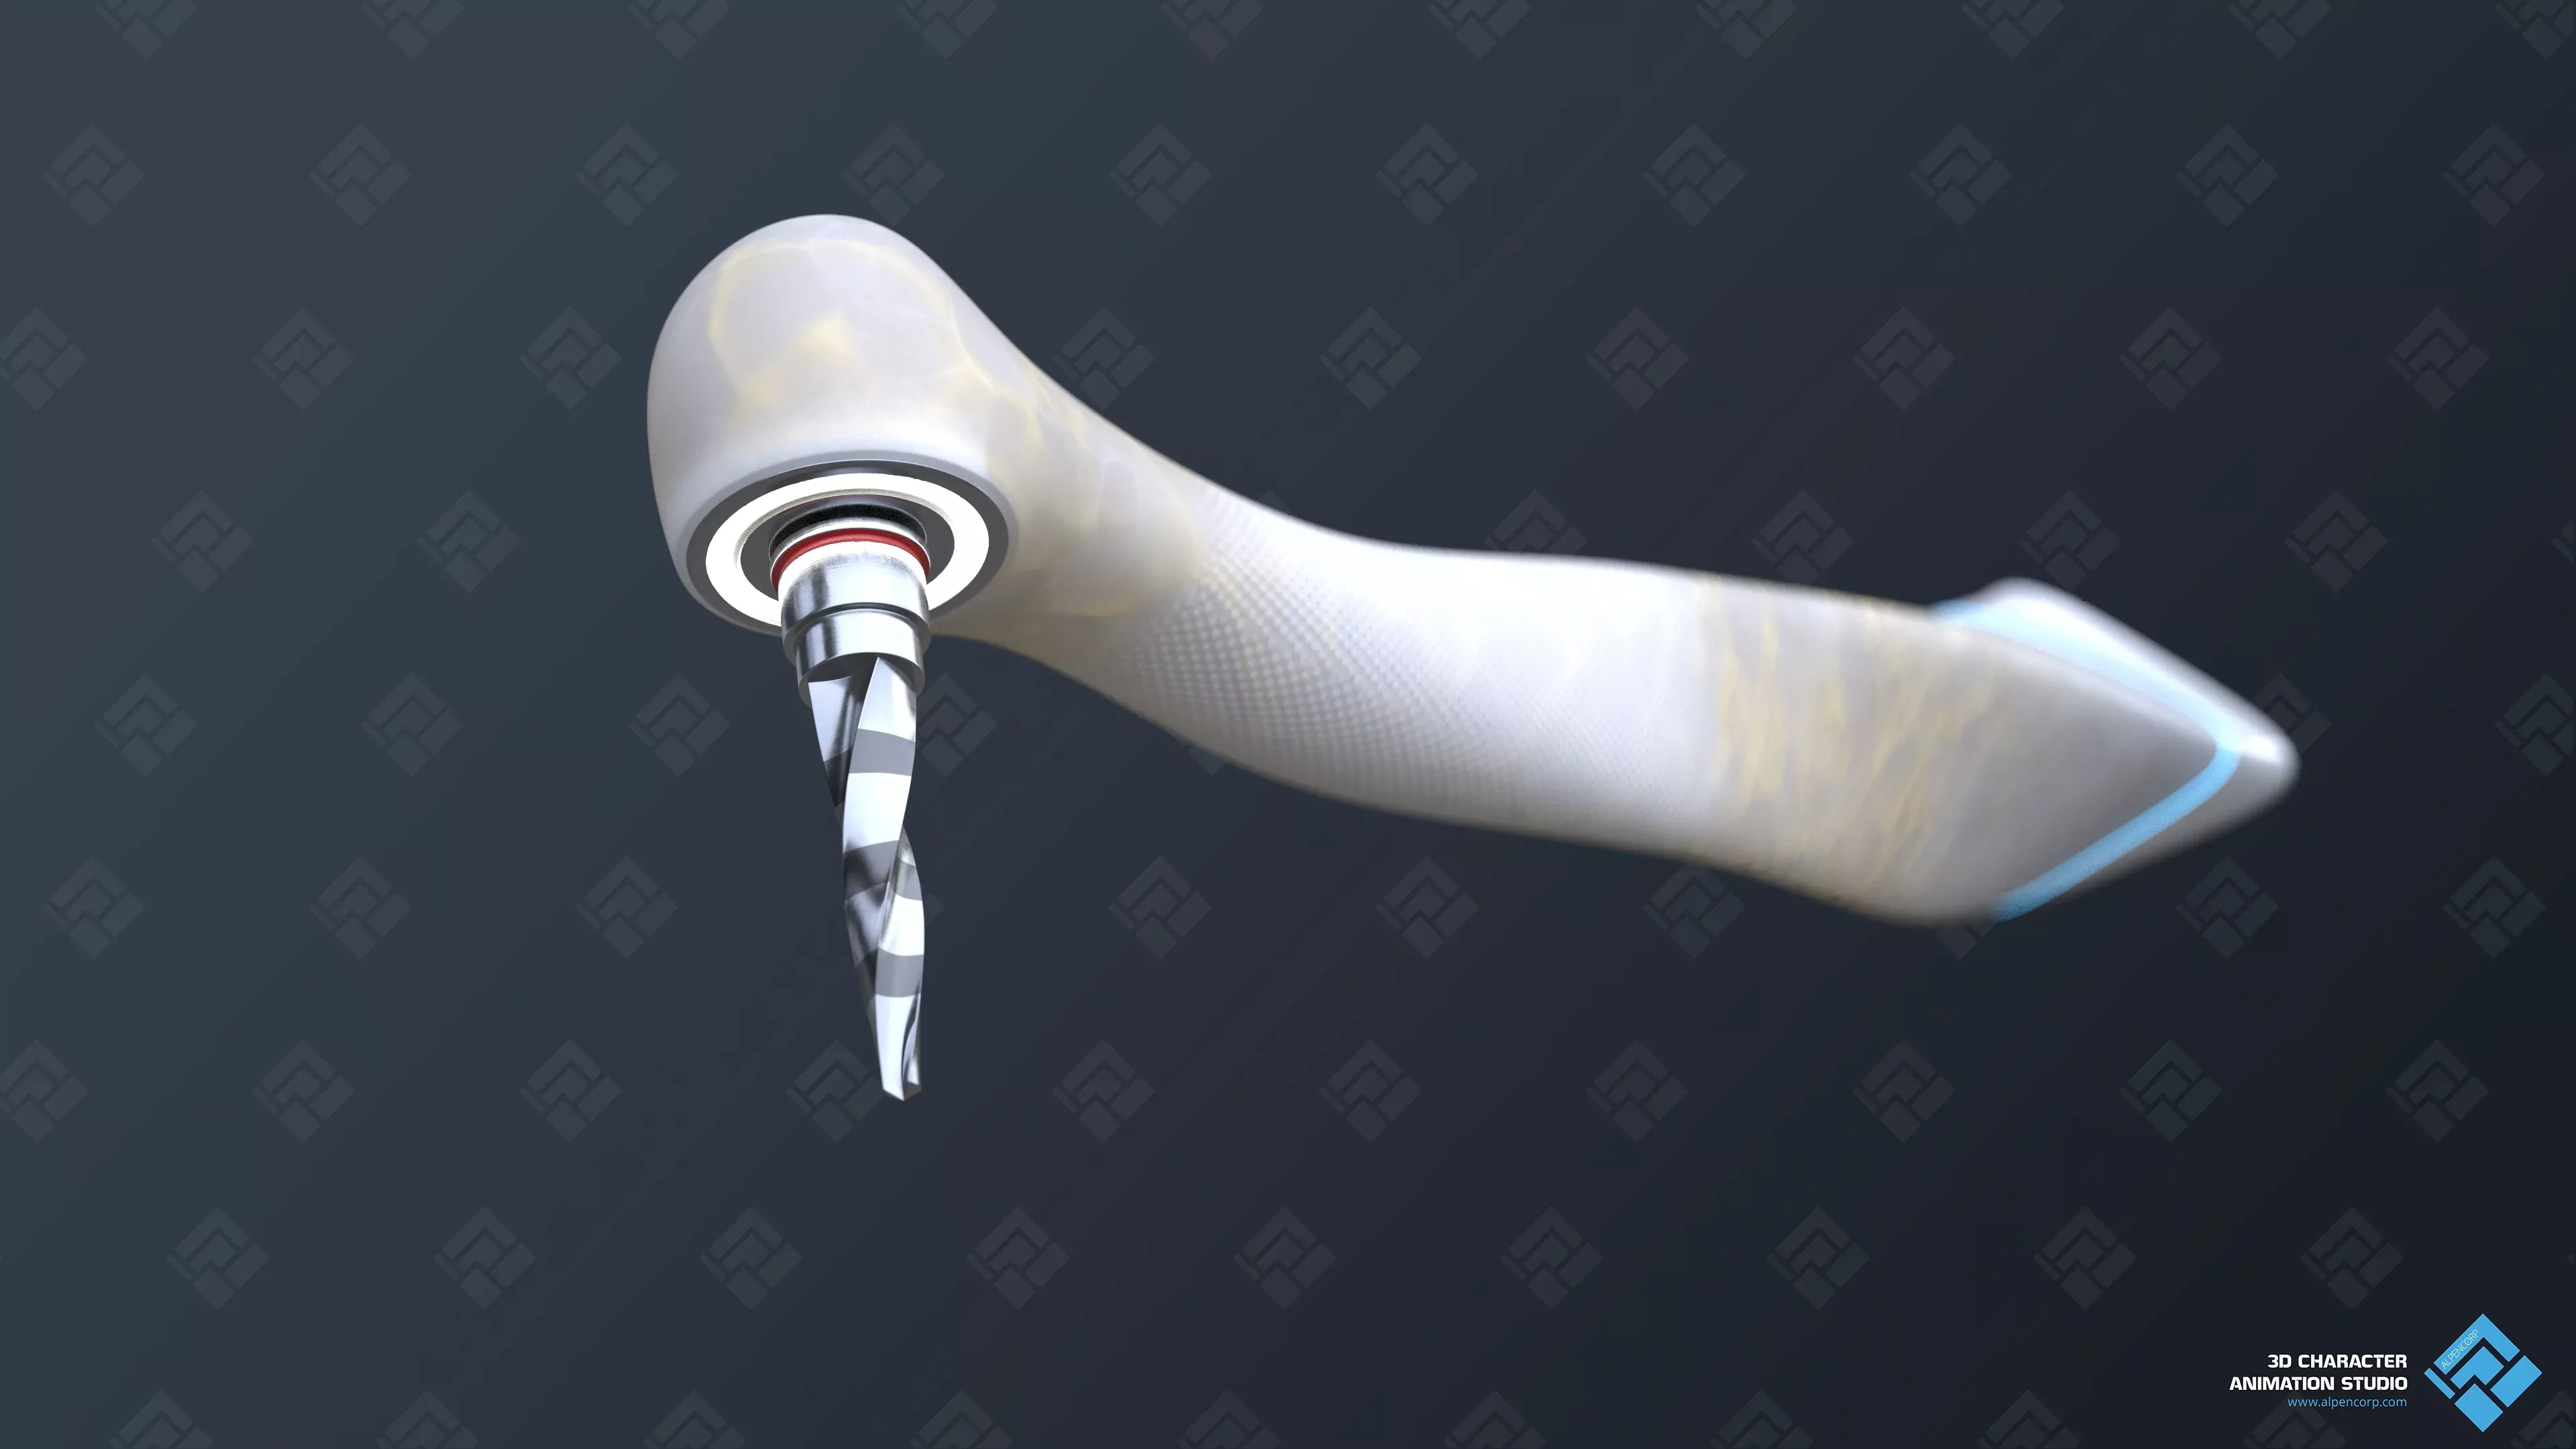
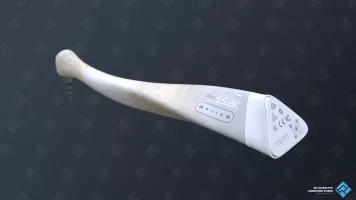
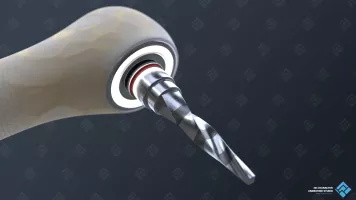
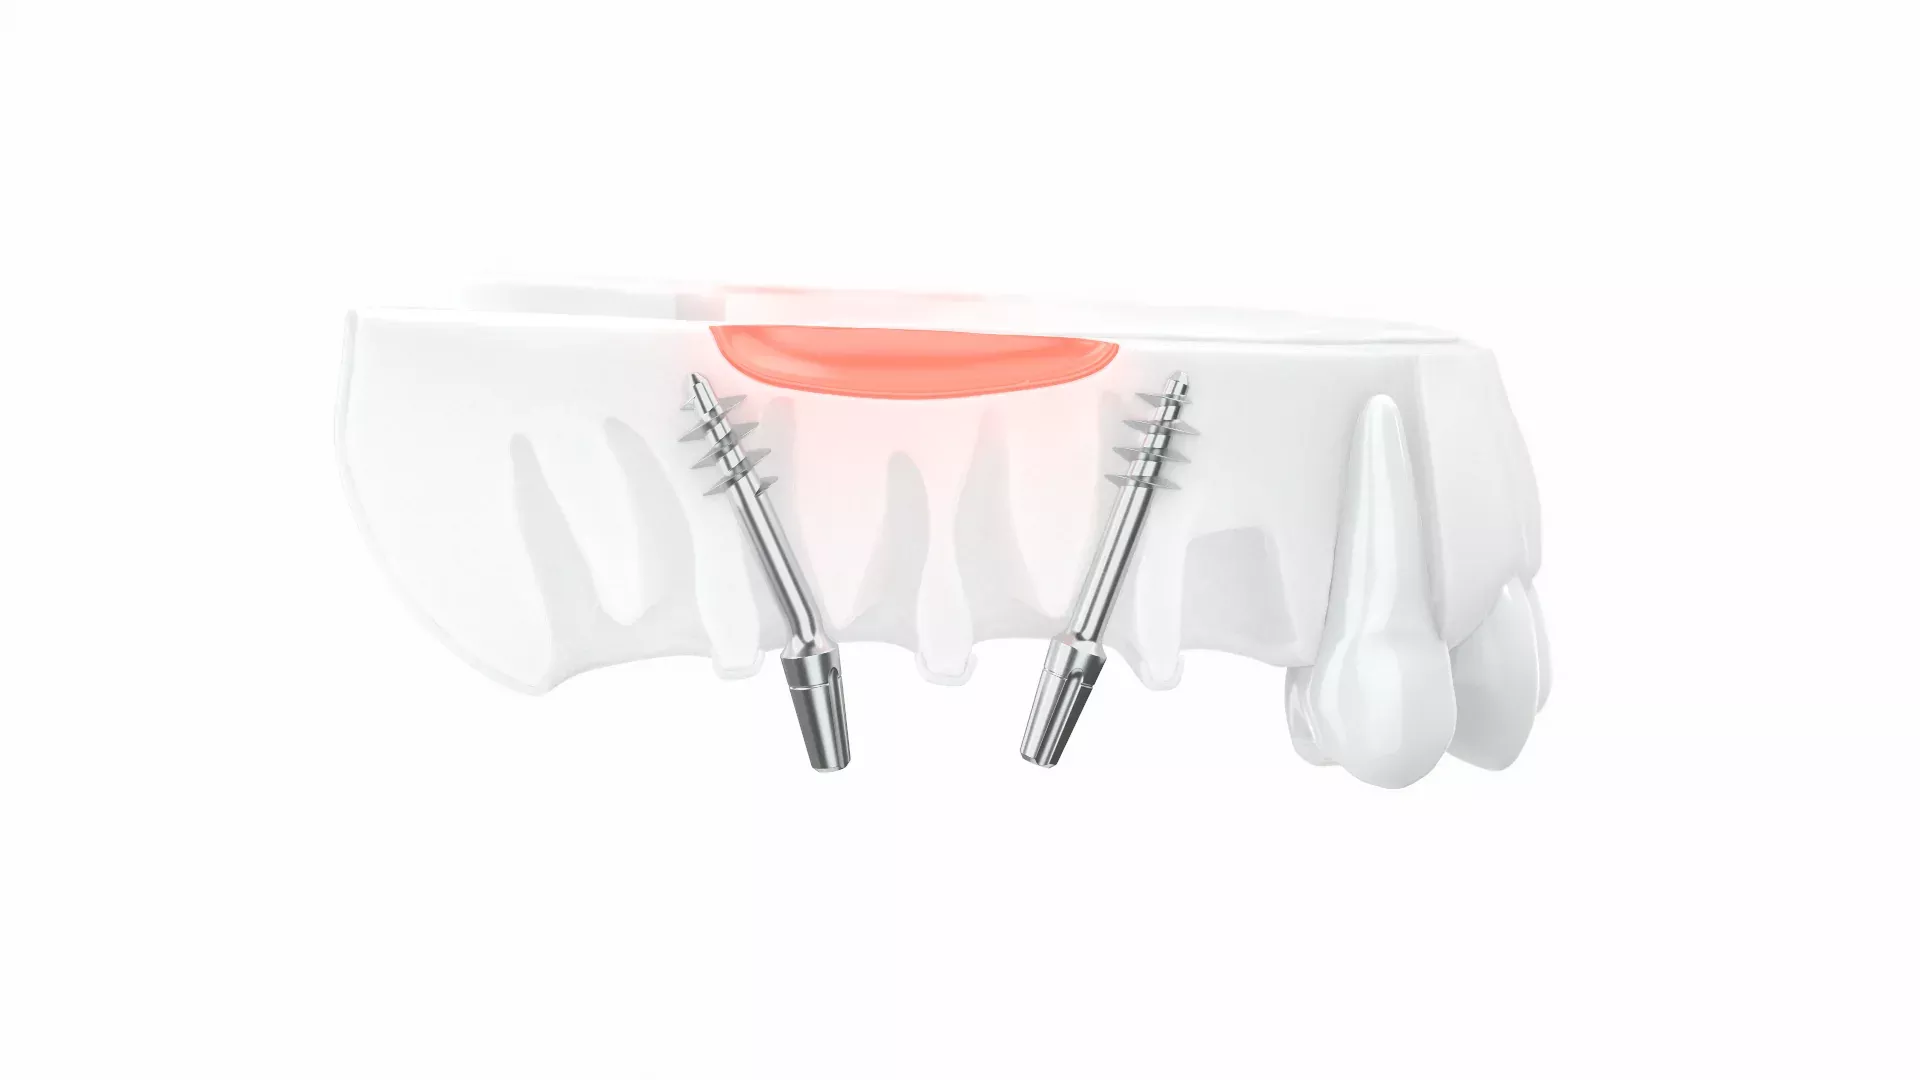
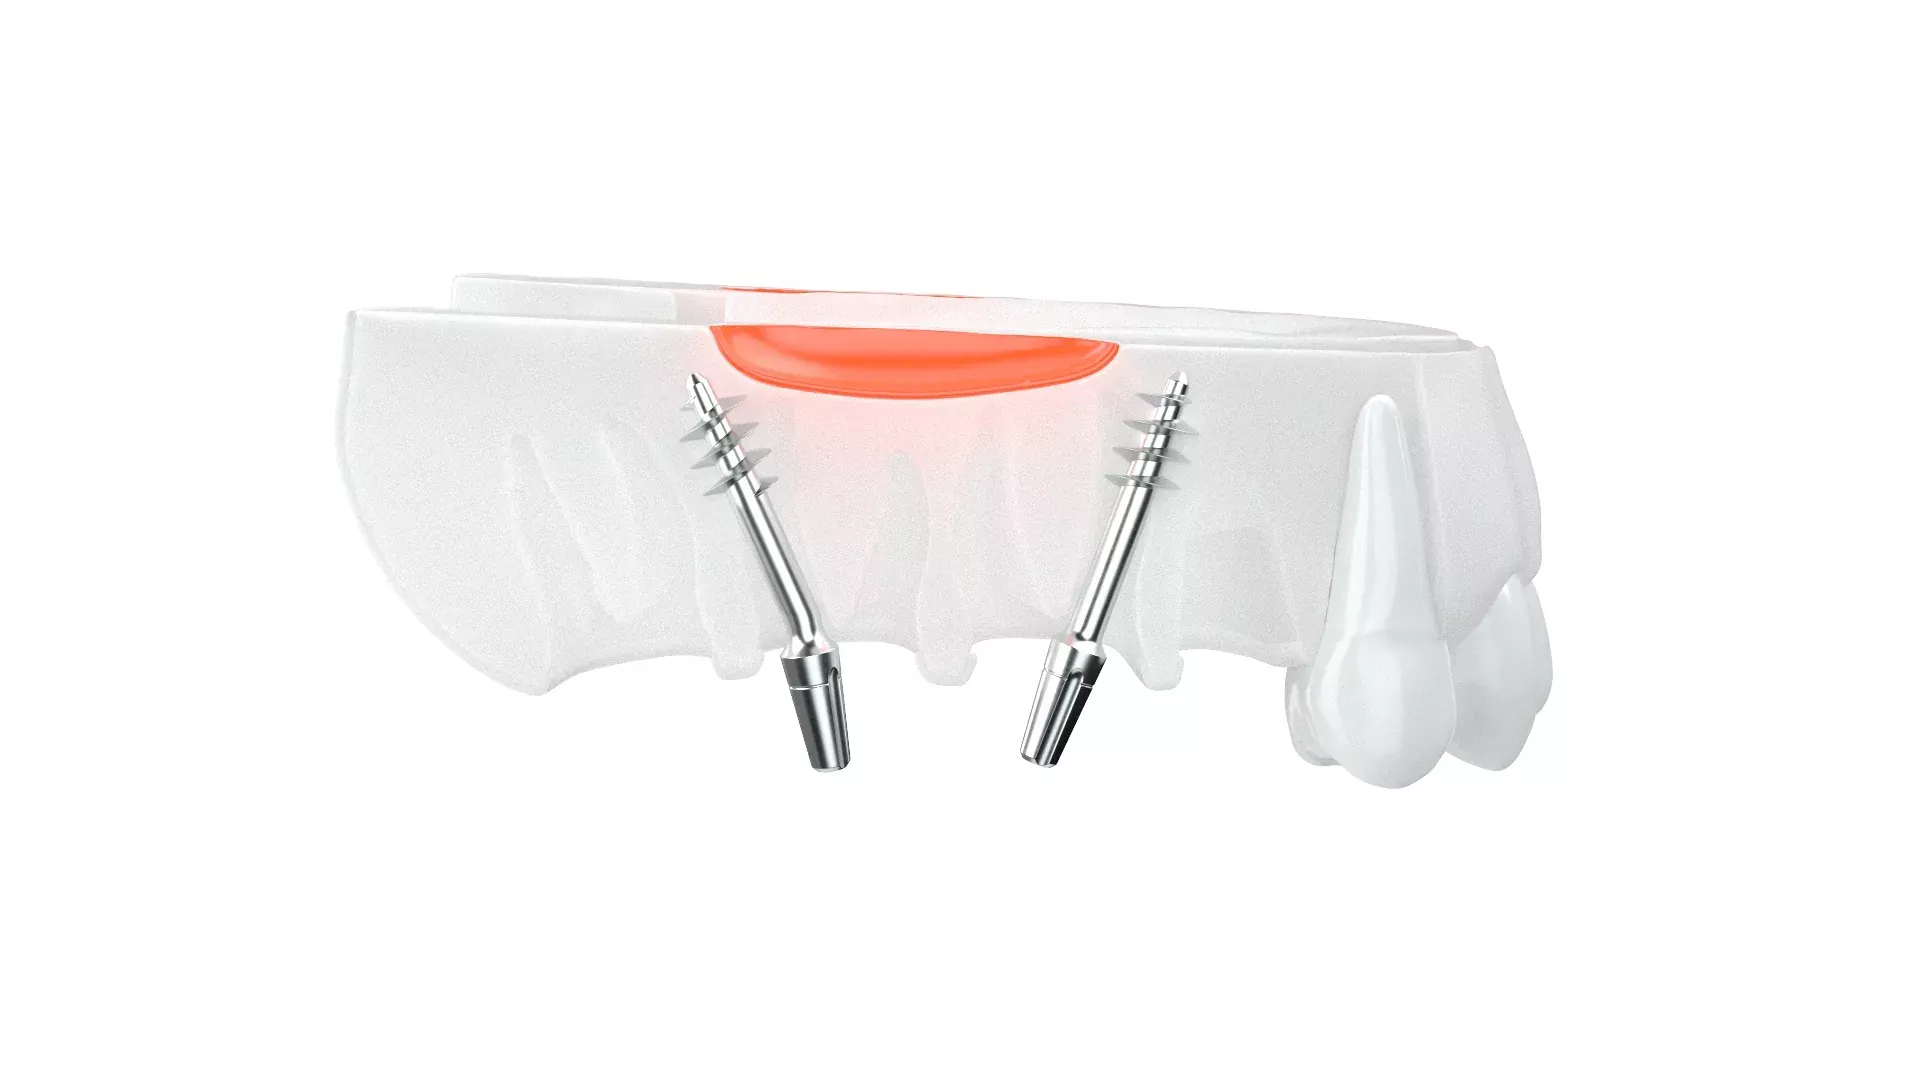
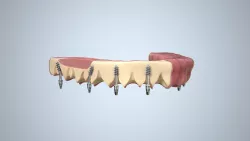
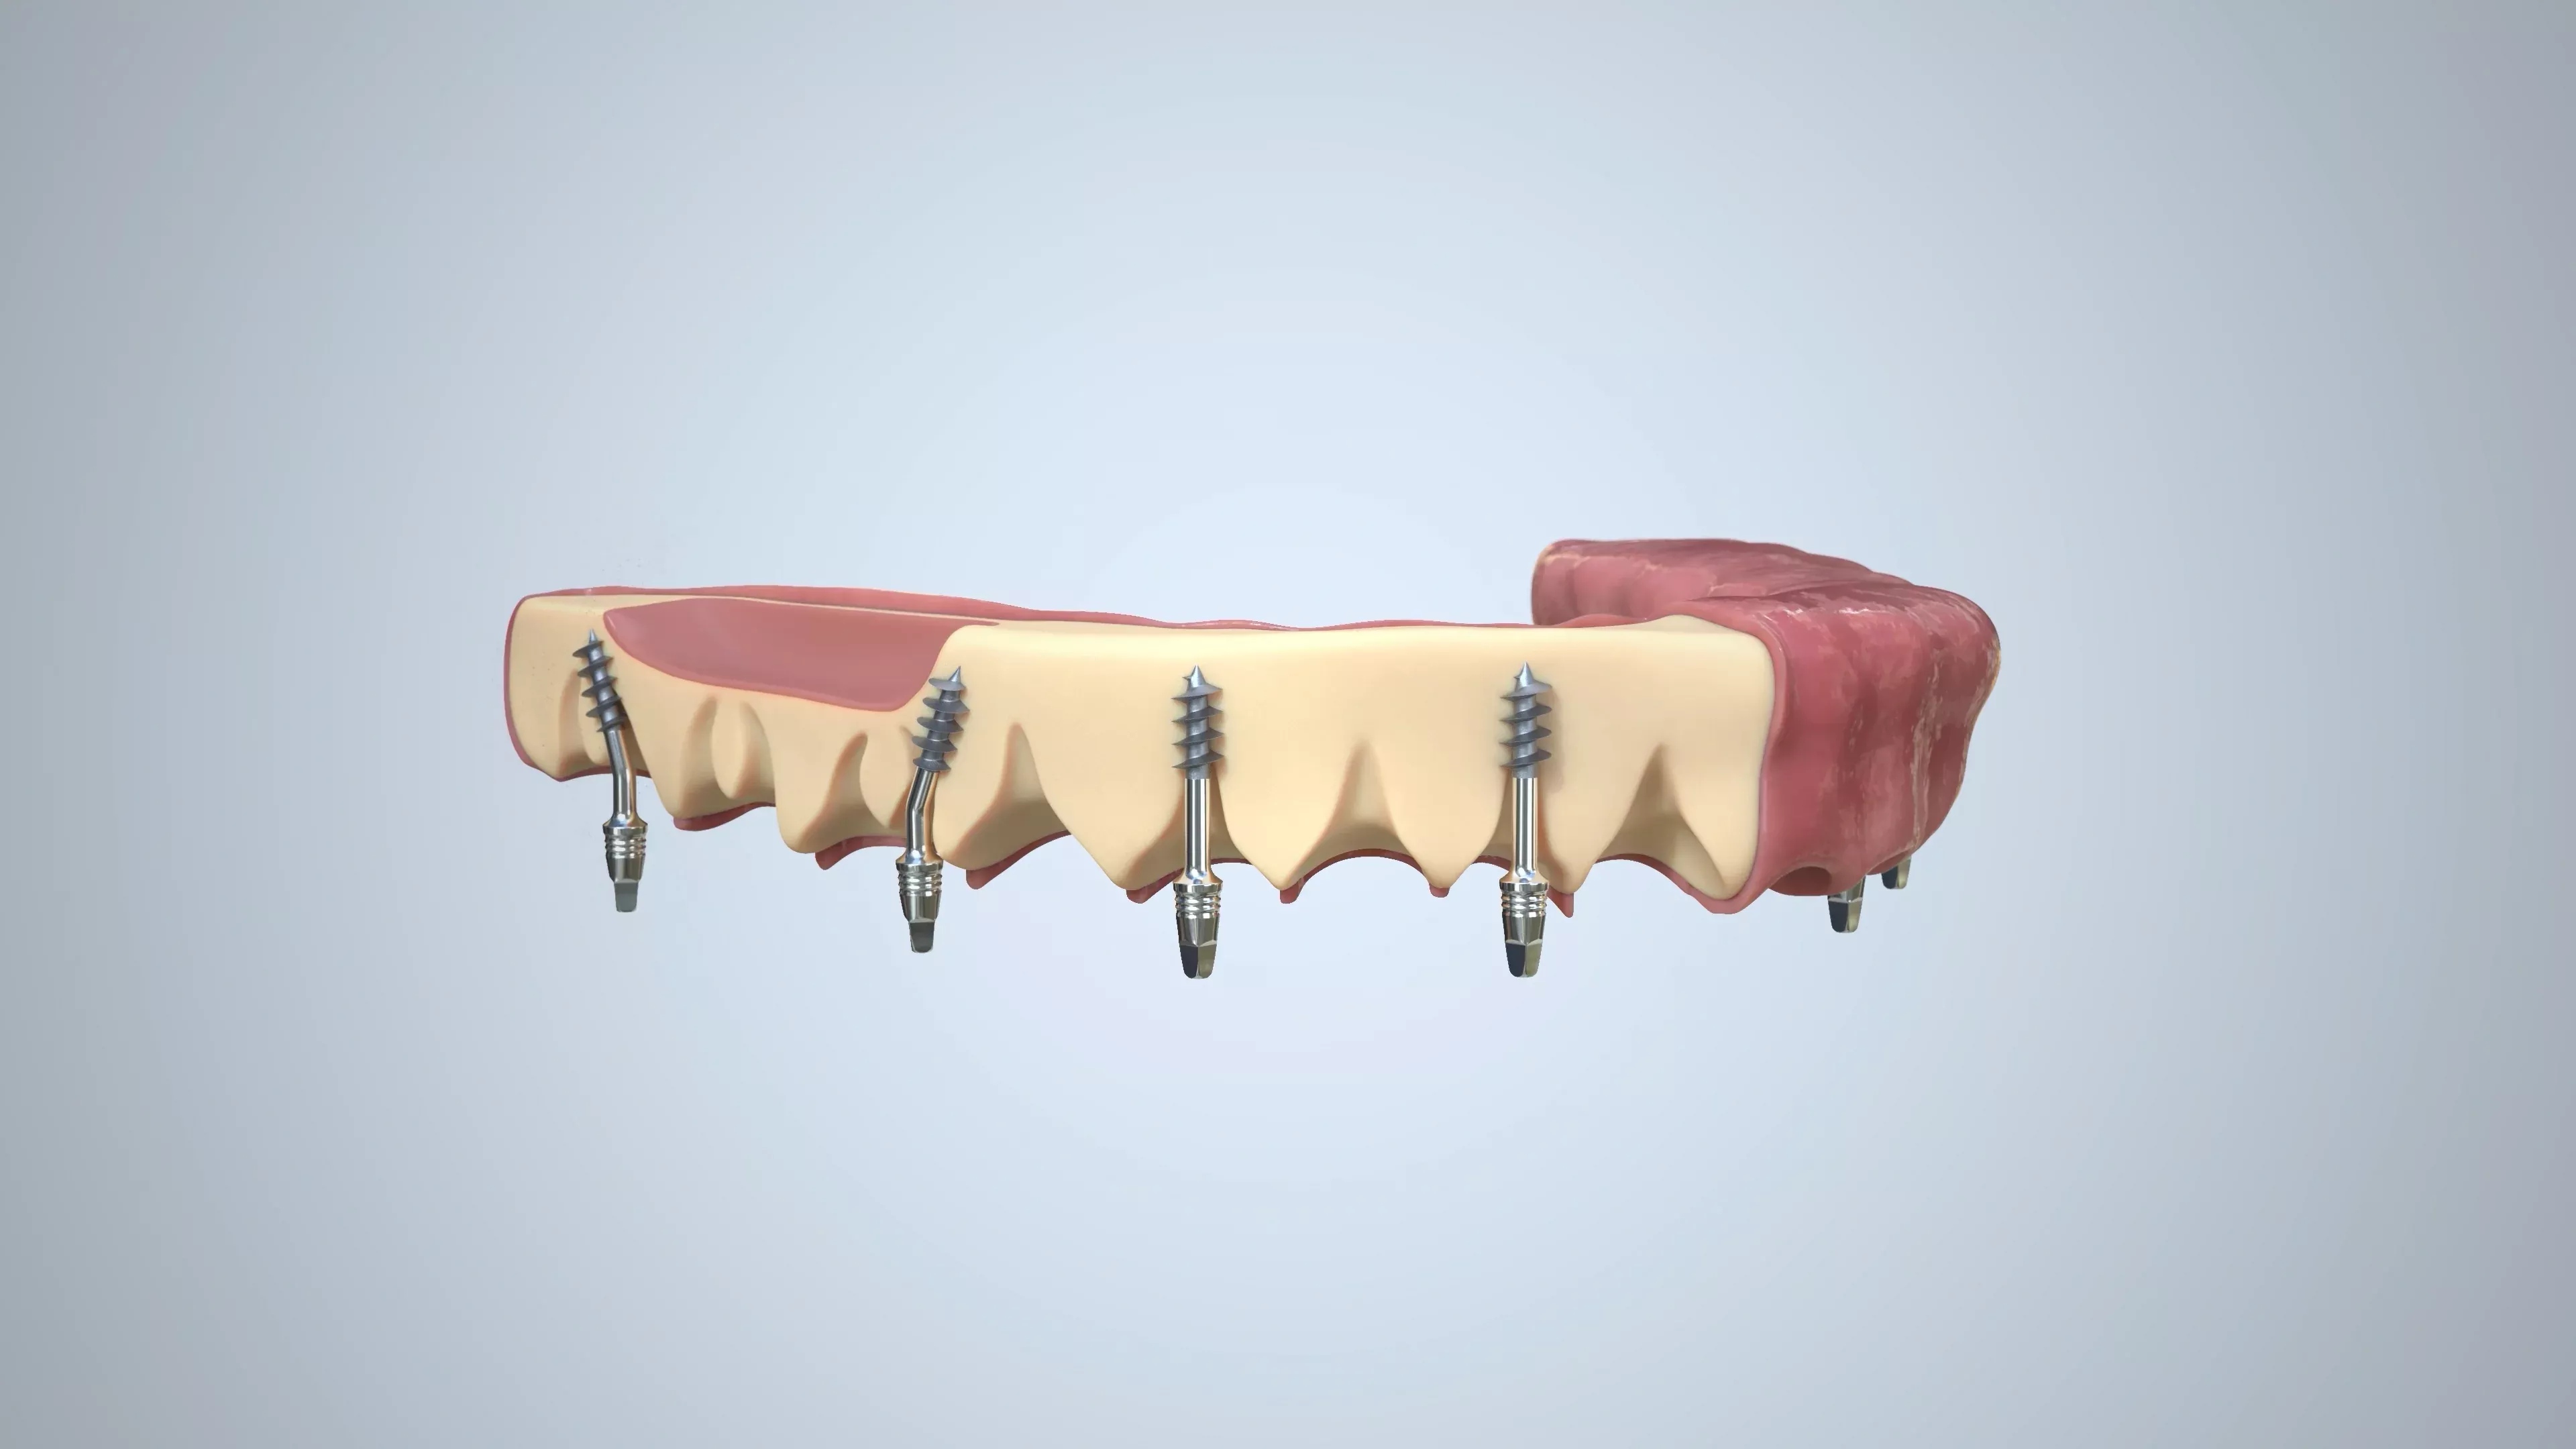
We can use a white translucent polymer for the jaw and gum. The important objects will have a bright glowing orange, which will be seen through the white polymer.
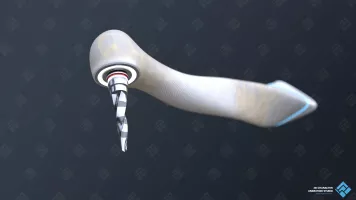
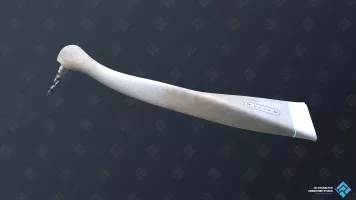
The equipment
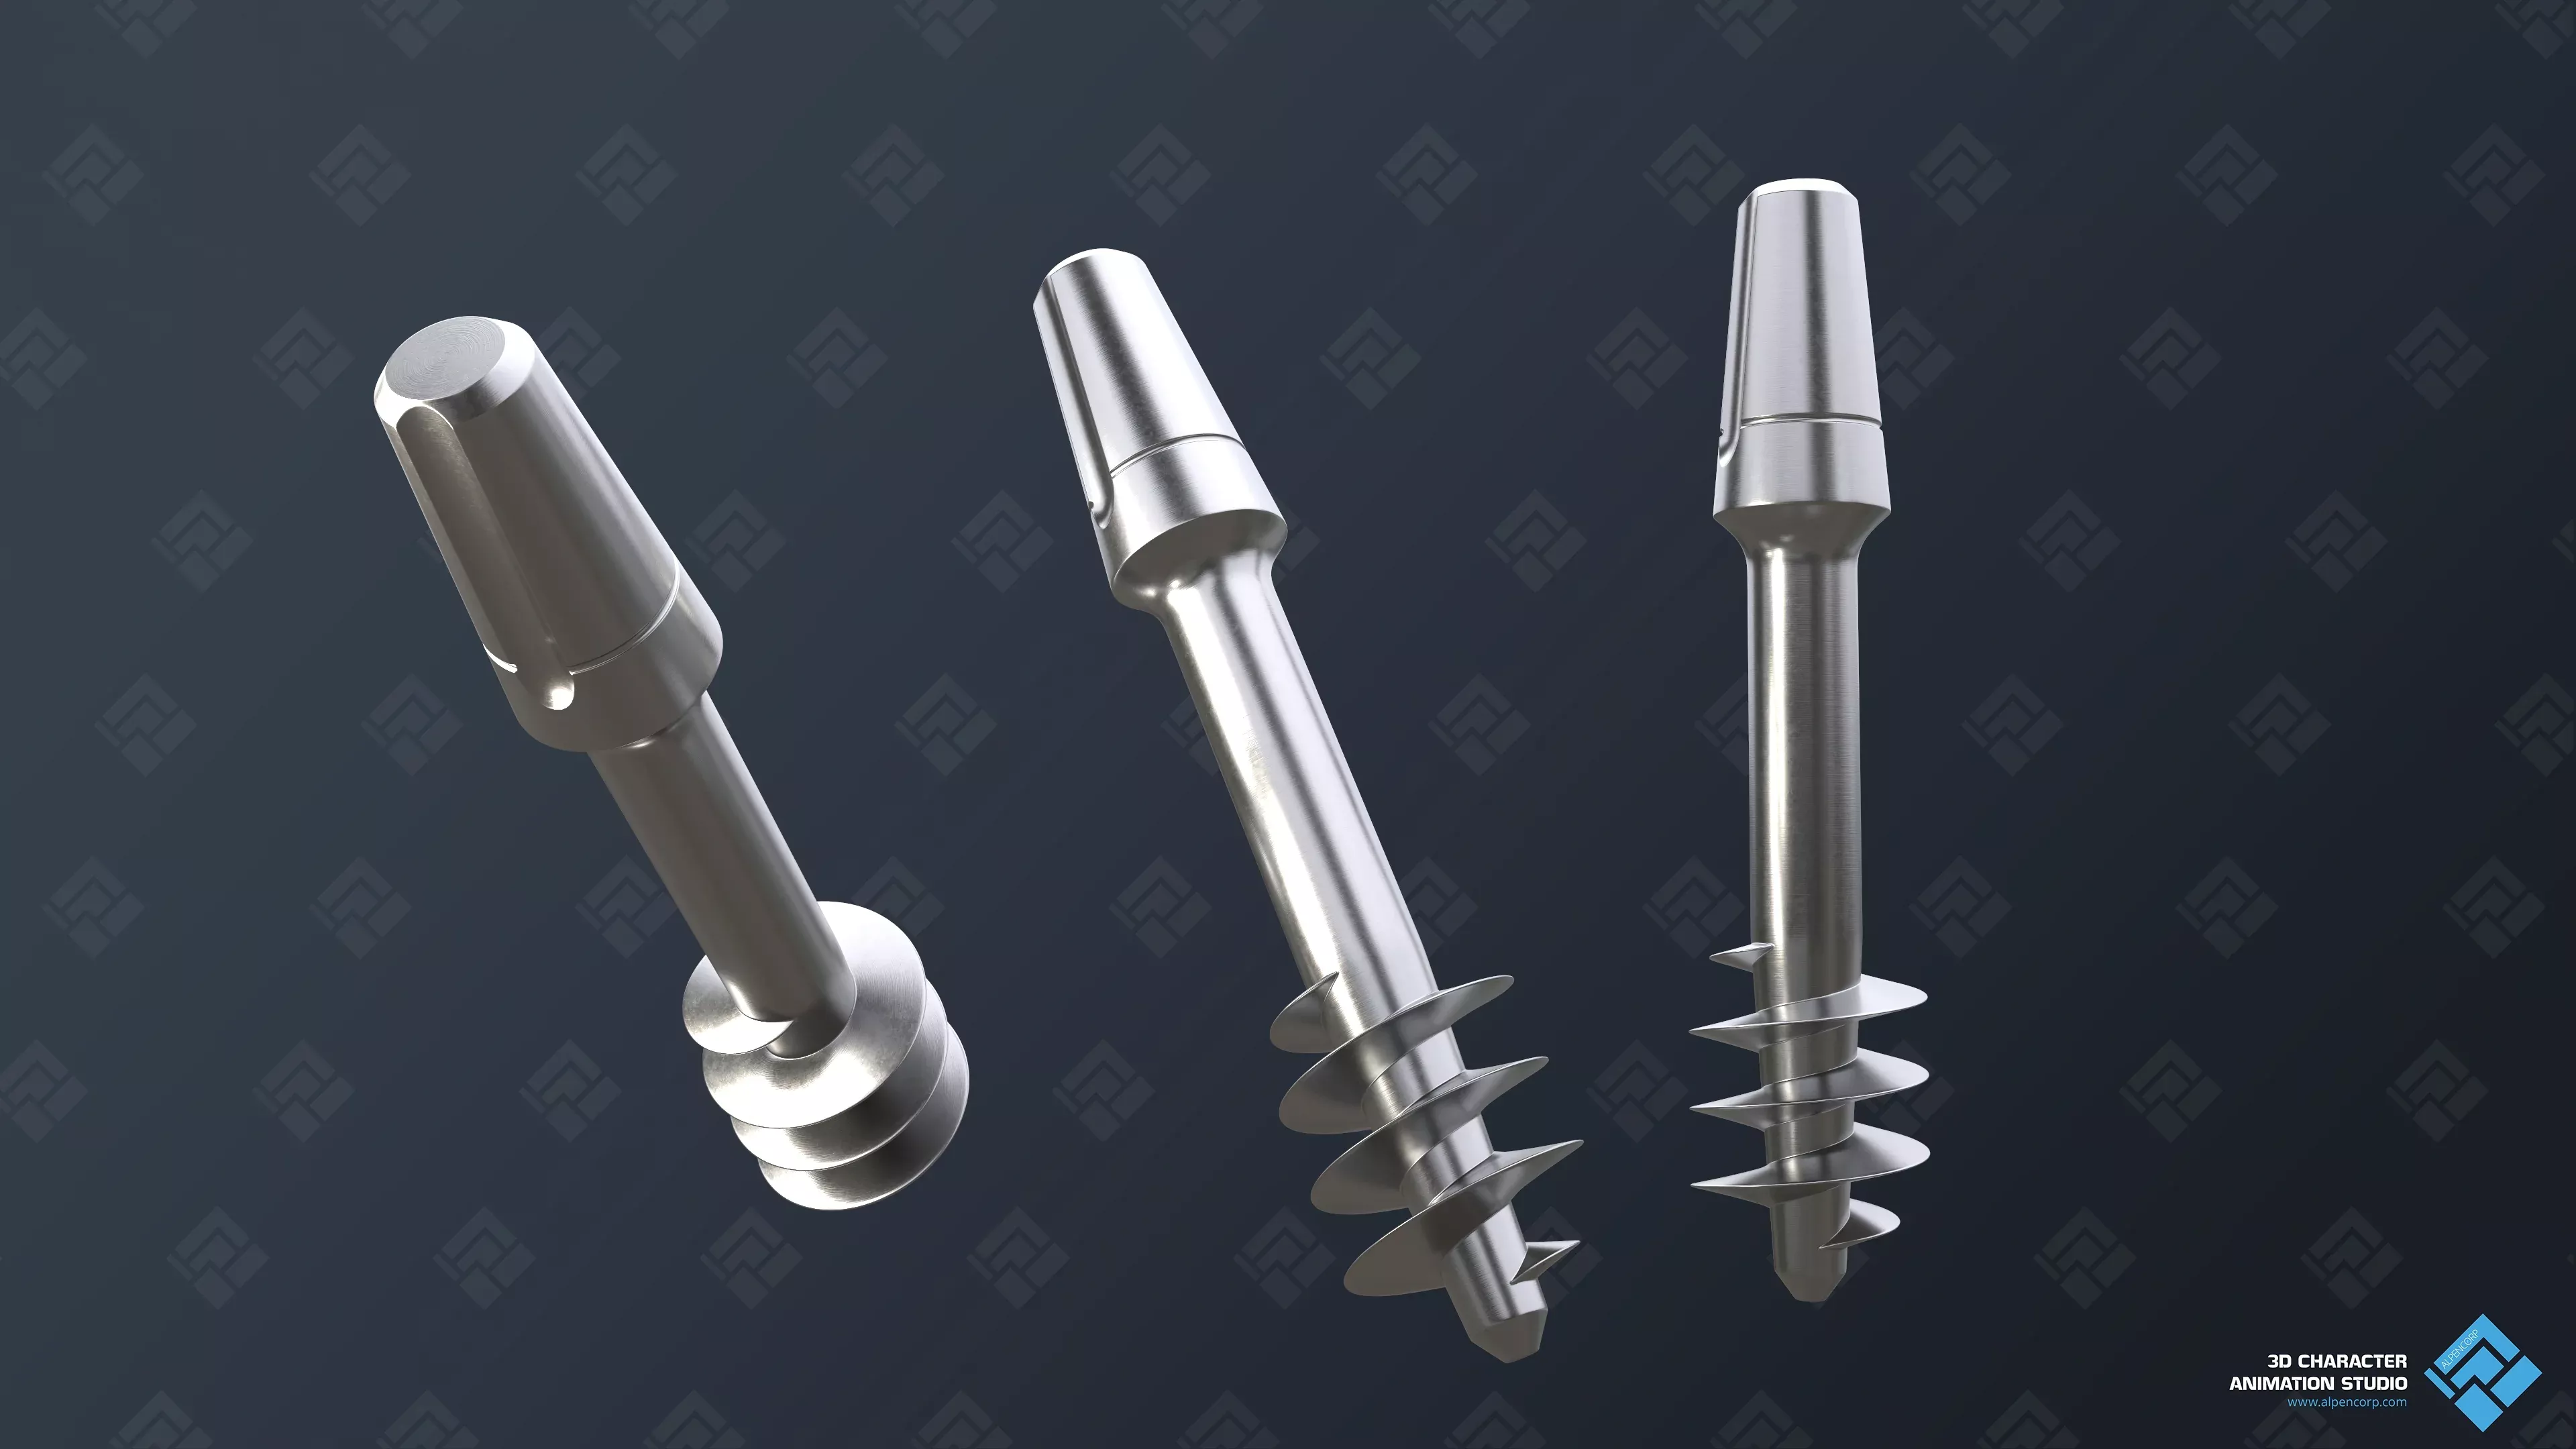
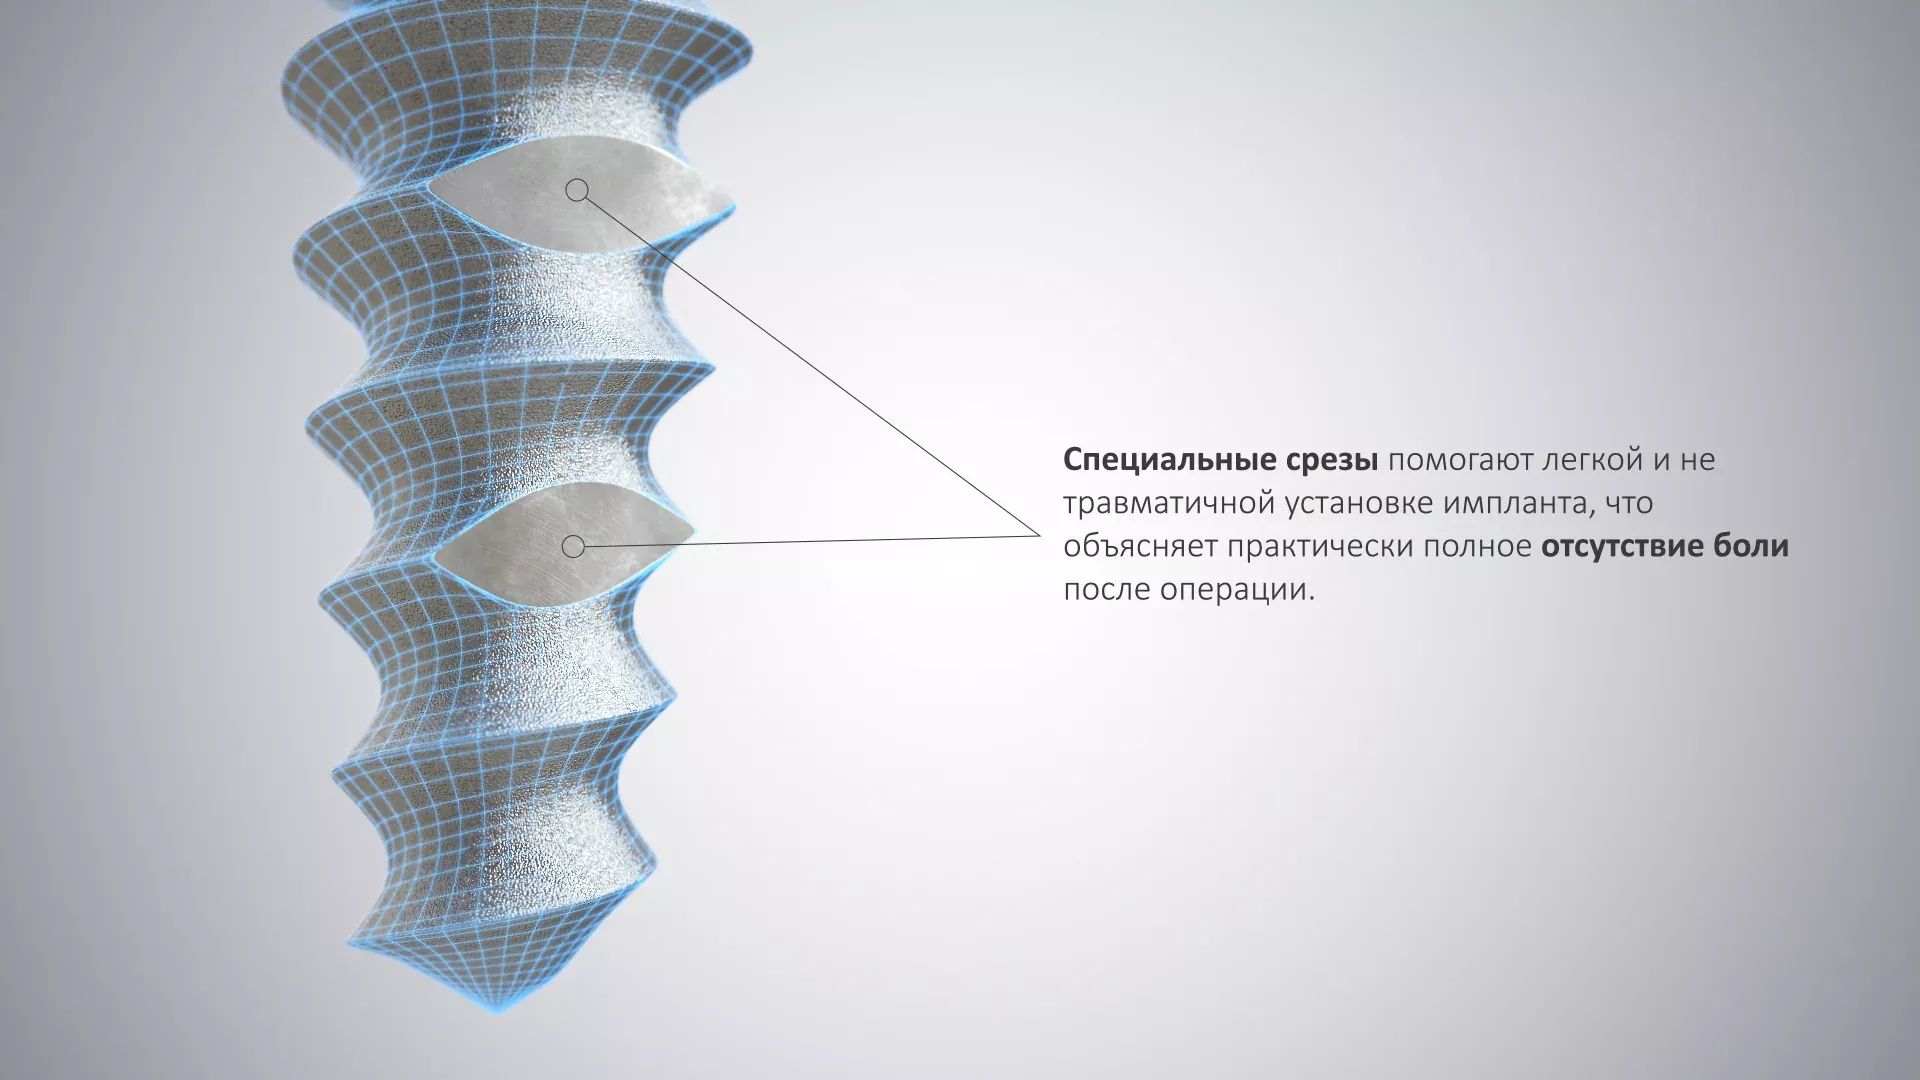
The medical equipment will have a conceptual design without wires. It will be minimalistic and made of composite materials in an ergonomic form. Between lie and illustration is a thin line, and we should use realistic design for implants, crowns, and the drill because these objects contact the patients. But the other advantages can be fully illustrative, as a representation of the relative clinic's advantages.
Palette
Primary colors:
- Clean white.
- Translucent white.
- 80% of black, blue and gray, white as a background.
Contrasting colors:
- Red.
- Orange.
- Blue.
- Black.

Materials
- Translucent white polymer.
- Glossy plastic.
- Ceramic.
- Steal.
- Gold.
- Composite, carbon fibers.

Modeling and Texturing
THE IMPLANT, DRILL & BUR
We extrapolated current tendencies in the technical design for creating the dental drill. A metallic trabecular structure was filled with translucent white polymer and formed a strong light hull.
The handle's area has notches and gradually turns from round into a triangle shape. The bottom is thicker and has a triangle shape to better position on the drill's charging stand. The head was reduced to provide more freedom to the surgeon. The bur has a real shape and extra light.
The drill has sensor adjustments, OLED indicators for speed, and charge status. Also, we added some usual certificates for such equipment and the manufacturer's name "ALPENCORP".
The implant is a complete copy that surgeons use for the client's patients. The textures have the extra resolution for extreme close shots.
THE GUM & JAW
We specially didn't make a trabecular structure for bone and blood vessels piercing it because such anatomic details may scare potential patients.
During bloody operations, we push away the clients from scene details with artificial materials, and when it's time to show the final beautiful result, we bring them back using realistic mouth and teeth surfaces. Simultaneously, we don't need to show the cutting gum process, but only simple disassembling like a model in the dentist's office.
3D Animation
STEP 1 — 3D ANIMATION DRAFT
It's OK if the first draft of 3D animation has mistakes, penetration of the one by other objects in the scene, and lack of details. We only check if the closeup shot and other script actions look seamless and nothing more. If you make animation straightforwardly, you, with a high chance, will have to make unnecessary changes. Here you can see what a scene looks like when we work on it.
STEP 2 — TRANSFORMATION
The next step is VFX. Let's make our animation bright. Of course, it's not the most significant part of the project, but well-done VFX is like a cherry on the cake, making the video attractive. One important thing is consistency. The extra animation must look the same as the primary part of the video, no better, no worse.
STEP 3 — FINAL VERSION OF ANIMATION
Finally, we put together all of the animation parts. Because of the translucent shaders, the entire scene rendered much longer and we had to be very watchful. One shouldn't miss even a little mistake, otherwise, it will take us to re render some frames for at least several days.
Compositing
When it's all nodes, we collect all rendered frames and passes, then do some color adjustments, post-processing, fix small mistakes, and a few improvements to make the final video, at least, as expected or better. Below, you can see the results of post-processing and compositing.


